Thursday, November 12, 2020

Carbonara

Trickiest thing about carbonara is the last 30 seconds.  Wrong move, wrong temperature, and you get a glom of gluey pasta or scrambled eggs.  You can find lots of posts on how to make it, but until I made this one change in technique, the perfect carbonara eluded me.

Ratios:

1/2lb pasta (spaghetti or linguini)
1/2 cup micro plane pecorino
1 egg yolk and 1 egg
1/2 lb bacon or pancetta

  1. Fry bacon in a pan until just on the edge of crisp in a large enough pan to hold everything comfortably when done. Remove most but not all rendered fat and turn off heat to pan (see number 2 below for timing)
  2. Cook pasta trying to time so it is done about 3 minutes after number 1 above.  You want bacon pan warm but not hot enough to scramble egg mixture.
  3. During 1 and 2, prepare egg and cheese mixture, whisk together well.
  4. When pasta is done, add pasta to bacon pan mixing with bacon and rendered fat.  I use tongs or a pasta hook to scoop right out of water into pan. You need the hot water for below.
  5. Quickly add about 1/2 cup +/- of the hot cooking liquid to the bacon and pasta pan and mix it up
  6. Add a couple table spoons of the hot cooking liquid to the egg and cheese mixture.  If too hot add 1 tbs of cold water first.
  7. Add egg and cheese and water mixture to the pasta and bacon mixture adding more pasta water if too gluey.  It will set up in the next couple minutes so err on the slightly runny side.
  8. Plate on hot plates
  9. Garnish with fresh ground pepper and fresh parsley or basil if you have it
Steps 5 and 6 are the difference from the traditional carbonara recipes.  Most say to add water last.  I found that this was too late, you already had a blob of gluey pasta that wouldn't recover.  So this is my secret sauce.

I have also added vegetables to the cooking pasta for a one-pan meal like the green beans in the pic below, though I would opt for broccoli instead.


Sunday, March 08, 2020

Pork Tenderloin with Mushroom Gravy

Sorry no pictures this round.  Trust me though...

1 Pork tenderloin cut into 3/4" thick medallions.
6-8 sliced cremini mushrooms
1 onion sliced
Cornstarch
Salt and pepper for seasoning
Salt for brine
2 cups chicken or mushroom broth
Oil
Butter

Brine pork medallions in a quick salt brine for 1-4 hours
Remove from brine, pat dry with paper towels and season with salt and pepper (easy on the salt though since they were brined)
Dredge pork in cornstarch
In big frying pan, preferably cast iron, brown seasoned and dredged pork medallions in some oil, but don't cook through.  Make sure pan is hot enough to brown nicely.  Need enough oil so no cornstarch stays dry
Remove pork to plate or pan and hold in a 250 degree oven
Brown and caramelize onion and brown mushrooms in pan
Add broth and turn up heat so it starts to simmer and reduce, add pork back in, the residual cornstarch in pan and coating on the pork will thicken.  Turn pork several times to baste.  Turn off heat when gravy is right consistency.  Add a tablespoon of butter and/or cream to finish sauce

Serve with pasta, or rice or nothing.


Sunday, February 24, 2019

Braised Beef Shank

Was looking for a full pork shank to braise ala oso bucco.  Alas, all PCC had was cross cut beef shank.  But it did look good, so I figured what the heck.  Basically I made it just like braised beef short ribs but a one day vs. two day process.  The end result was a lusciously syrupy sauce compliments of reducing the slow braise liquids, the marrow in the bone, and some cheating **.  Nice thing about beef shank is it is usually pretty economical.

Recipe can be scaled up for more servings.  Below made two servings.

INGREDIENTS

(2) Beef shanks, bone in, about 3/4 lb each
(1) Onion chopped
(2) Carrots chopped
(2) Celery stalks chopped *
1/2+ bottle of full bodied red wine
(3) + cups beef broth
Tomato paste concentrate
Anchovy paste concentrate
Bay leaf
Salt and pepper
Oil
Butter
Thick sliced mushrooms

[* full disclosure: I didn't have celery when I made this but would have used it if I did...]

INSTRUCTIONS

In a large dutch oven ala Le Creuset, sear/brown seasoned meat in oil on high heat.  Remove to a plate.

Turn heat down and saute onion, carrot and celery until translucent in same pot.

Add wine to vegetables and reduce about in half.  After reduced, add beef broth, about 2 teaspoons of tomato paste concentrate (or 2" from a tube), and one teaspoon anchovy paste (or 1" from tube), and bay leaf.  Stir and bring back to simmer, add beef broth, meat and any juices back and make sure liquid covers.  

Cover with lid and put in 300 degree oven for about 2-3 hours.

Remove from oven, remove meat to a plate and cover and keep warm in oven now turned off.

Strain braising liquid of all the veggies, squeezing out liquid from veggies through strainer.  Return to pot and reduce until it starts to get a little saucy.  [** Sometimes I help this kind of sauce along by adding about 1/2 packet of unflavored gelatin to thicken.]

Add mushrooms to large preheated pan on medium high heat and brown in butter.

Add meat and any juices back to sauce and baste with the sauce frequently until it gets really saucy.  Add browned mushrooms during this process, but not before.

Once reduced to (almost) perfect saucy goodness turn off from heat and let sit for about 5 minutes in warm pot continuing to baste and the sauce will finish thickening.  Serve either by itself or over rice or a mash.


Sunday, January 27, 2019

Fluffy Egg Casserole

I wanted eggs light and fluffy, ala Prince Omelette of Vegetales fame.  So of course I googled “fluffy egg casserole” and came up with this eggscellent recipe:  https://www.crazyforcrust.com/cheesy-egg-casserole/

I substituted sour cream for the cottage cheese called for due to a shopping failure, but actually liked the slightly tangy result.  Added mild green chilies and PCC pork sausage bits (pre-cooked so the fat was already rendered and it was a little brown).  Our convection oven seemed to brown it too fast at the recommended cooking team, so I reduced it part way to 325.  Enjoy!


INGREDIENTS

 1/2 cup unsalted butter, melted
 1 16 ounce package cottage cheese (or sour cream)
 2 cups shredded cheese (I used mozzarella but wanted to use pepper jack)
 1/4 cup all purpose flour (GF or regular)
 1 teaspoon baking powder
 1/2 teaspoon salt
 10 eggs — lightly beaten

INSTRUCTIONS
Preheat oven to 400°F.  Use a non-stick pan or pre-grease or spray a baking dish.

Stir together butter, cottage cheese, mozzarella cheese, flour, baking powder, seasoning or add-ins, and salt. Whisk in eggs to mixture until combined (result will be lumpy).

Pour into prepared pan and bake for 30-40 minutes or until browned and set in the middle. Cool 5-10 minutes before slicing and serving.


Sunday, July 08, 2018

Meat Candy (aka crack)

Smoked, Braised and Caramelized pork belly.  Inspiration taken from here:  Vindulge

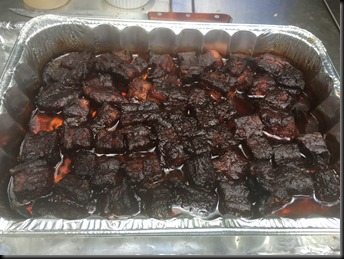
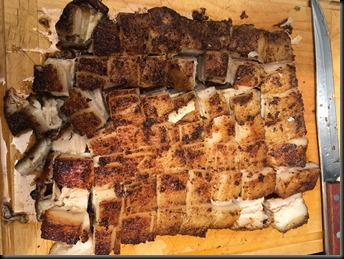
Took about 4 lbs of fresh pork belly purchased from butcher shop, center cut.  Scored the fat side about 1/2" deep and rubbed with pork rub the night before and wrapped with plastic and refrigerated over night.  Smoked with apple wood fat side down for about 4 hours then flipped over and smoked for another 2 hours until it got brown and internal temp was close to 180.  Cut the cubes all the way through and transferred to aluminum pan and coated with some honey/sugar rich BBQ sauce.  Covered with foil and braised in the oven at 300 for a couple hours. Uncovered and drained fat off, added a little more BBQ sauce and then caramelized in the oven for another couple hours.


Finished Product


2018-07-07 16.28.54

Braised before caramelizing

2018-07-07 12.50.39

Smoked and cubed, ready for braising

2018-07-06 18.56.34

Pork belly fat side down with rub on


Tuesday, December 27, 2016

Lasagna and Home Made Ragu

I did a bunch of lasagna research and found that béchamel based lasagna is Northern Italian and Ricotta based is Southern Italian.  I found one Giada recipe on Food Network that had both which I didn’t find anywhere else.  One day I will try doing a béchamel lasagna, but so far I always punt on that cause I am tired of cooking by assembly time. Instead of making separate tomato sauce and then sprinkling on the meat, I make a ragu.  And instead of layering the ricotta and spinach separately, I mix them together first.  The quantities below make either two medium size lasagnas or one really big one and will feed 12 adults. 

Ragu sauce (make day ahead or some other day and freeze)
  • 1.3 lbs of mild Italian sausage
  • 1.3 lb of ground chuck
  • 2 cans 28 ounces diced tomatoes (good ones will make a taste difference)
  • 1 can 28 oz crushed tomatoes
  • Chicken broth
  • Garlic
  • 1/2 tsp cayenne
  • Red pepper flakes
  • 2 medium yellow onions chopped
  • 2 carrots finely chopped
  • 2 celery stalks finely chopped
I used a big Le Creuset for all of this:

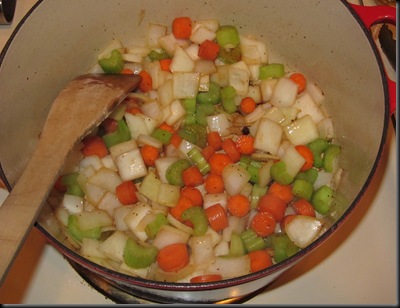
Cook and render the meat slowly, and then drain the meat. I recommend not browning, but keeping the meat soft.  Make sure to cook and drain thoroughly or you will end up with greasy lasagna. Remove to a paper towel lined bowl.  Saute the veggies in the same pot in some olive oil until soft (add chopped garlic at end).  Add the meat back and all the tomatoes, some black pepper (the sausage usually is salty enough) and a couple bay leaves and cayenne. Add broth if it seems too thick.  Cook covered in the oven at 275 for 3-4 hours.  When done, it will have a totally different consistency, everything blended together and actually not very saucy.  If you don’t cook it this long the flavors just don’t happen and it will taste like raw tomatoes with some meat and very bland.  This is great for just topping pasta BTW.

[2022/23 update:  This Ragu comes out really thick and not at all “saucy”, which is intentional.  What I have found however is that it is hard to “stretch” it enough for all the layers.  I have started using some puréed italian tomatoes with some light italian seasoning and salt and pepper and brushing that on the noodle layers before the Ragu]

I mixed two packs of chopped spinach (after thawing and squeezing all the water out) with two 16 oz containers of ricotta and 3 lightly beaten eggs. 

Olive oil sprayed the baking dish then layered:
  1. Thin layer of the ragu on the bottom of the pan [2022/23 update: use the sauce noted above instead for this base layer.]
  2. Single layer of noodles (regular or GF)
  3. 2022/23 update thin layer of the sauce brushed on
  4. Ricotta and spinach layer
  5. Shredded mozzarella cheese
  6. Ragu (with a very light sprinkle of red pepper flakes)
  7. Noodles
  8. 2022/23 update thin layer of the sauce brushed on
  9. Ricotta and spinach layer
  10. Ragu (with a very light sprinkle of red pepper flakes)
  11. Shredded mozzarella cheese
  12. ¼ cup of grated parmesan or Romano.
Cover loosely with foil (I kind of tented it so the moisture could escape) and bake at 375 for somewhere between 45 minutes and an hour + till all bubbly, then uncovered for about 15 minutes to brown.  I put a foil covered baking sheet under it, which protected the oven and made it easier to take out. Then let it rest for a full 30 minutes.  

A few tips:  if you spray the foil it isn’t supposed to stick to the cheese. The resting time is essential or you will end up with soupy lasagna.  Make the Ragu a day or more before, otherwise it will be really hot when assembling and your lasagna dinner it will take All. Day. Long. I haven’t got the thick chewy noodle layers I like in good lasagna yet - I suspect the oven ready no boil noodles. 

*** 2023 “Quick and Smaller Lasagna” 

I am trying to perfect a decent lasagna that you can get in the oven in 30 minutes total.  Below is first attempt with my notes for next time:

Smaller lasagna dish that perfectly fits 3 noodles un-trimmed in each layer.
32 oz jar of Rou’s sauce, preferably bolognese.  Don’t go cheap on the sauce, this is where the flavor comes from.
1lb of mild italian sausage
24oz of ricotta + 2 eggs
Frozen spinach
Shredded Moz
Grated parm

Cook the meat, drain it, and add the jarred sauce but reserve a little
Do layers like above, but use the jar sauce for the first thin sauce layer
Instead of thawing out the spinach and then draining it, sprinkle frozen bits on the ricotta layer
I would add some heat next time like cayenne pepper to the sauce.  Didn’t have enough punch.

I was able to assemble from a “clean counter” to putting it in the oven in 30 mins.  Not as good as using home made Ragu, but sometimes you just want Lasagna. 

Ragu and lasagna pictures at different stages:


Sunday, November 27, 2011

Personal Size Apple Crisp

Post Thanksgiving, tragically we had run out of apple pie.  But I had a leftover peeled Granny Smith apple in the refrigerator so I decided to improvise a personal size apple crisp suitable for the application of appropriate amounts of vanilla ice cream.

Referencing an online recipe for crisp topping, I approximated the ratios.  The filling I eyeballed, so some adjustment may be necessary.

Ingredients:

  • 1 large ramekin
  • white sugar
  • brown sugar
  • cinnamon
  • oatmeal
  • flour
  • salt
  • butter
  • 1 large Granny Smith apple peeled

I thinly sliced the apple and in a mixing bowl, combined the apple slices, some white sugar (about 2 tablespoons or so), some cinnamon (about 1/4 tsp) and a dash of salt until well coated.  I put this in the ramekin with enough left over for a small ramekin.

In a 2 cup pyrex measuring dish, I melted 2 Tbs of butter.  I added to that 2 Tbs oatmeal, 2 Tbs flour, 3 Tbs brown sugar, about 1/2 tsp cinnamon and a dash of salt, combined and pressed on top of apple mixture in Ramekin.  There wasn’t enough for the small ramekin too, so it went “naked”.

In a rush to get this goodness in me, I decided to use the combination cook setting on our microwave/convection oven after preheating it to 400 degrees.  In about 15 minutes the apples looked done but the topping not quite.  I changed the oven to convect only at 400 degrees and gave it another about 7 minutes.

After cooling slightly and with the requisite ice cream, it was as good as anticipated.  Yummm.

Before cooking:

IMG_0966

After cooking:


IMG_0967

Saturday, November 05, 2011

Easy Crème Brulee

Though I have successfully made Crème Brulee the “traditional” way, with double boiler, etc., this way is much easier, almost foolproof, and takes less prep time. The quantities below will make 6 small ramekins.

  • 5 egg yolks
  • ½ C sugar
  • 2 C heavy cream
  • 2 tsp vanilla
  • Light brown sugar

Preheat oven to 300 and heat a tea kettle of water to not quite boiling. Prepare a large baking dish like a 9x13 or lasagna pan with the ramekins in it.

Put cream in a small sauce pan and warm gently on low. You do not want the cream hot, just slightly warm to touch, and bring it up to heat slow so the bottom doesn’t brown and you don’t get a skin.

Separate eggs reserving egg whites for something else, and combine egg yolks with sugar and vanilla in a mixing bowl large enough to add the cream later. When cream, water, and oven are all up to heat, add cream to egg yolk mixture and mix well, but don’t beat or whip.

Pour mixture into ramekins up to bottom of lip leaving about ¼”. Add hot water to baking pan and add additional hot tap water if necessary to bring water most of the way up the sides of the ramekin making sure there is enough room in pan so that it won’t slosh over either the sides of the pan or the sides of the ramekins when you move it.

Put pan with hot water and filled ramekins into oven (see note below) and bake for about 45 minutes to an hour until they start to set up and are slightly golden on top.  They will continue to cook in the hot water when removed.

Remove carefully from oven when done and let cool, cover ramekins with plastic wrap and refrigerate overnight.

Right before serving, sprinkle tops with a 1/16” layer of light brown sugar and put on a baking sheet. Mist with a very fine mist of water and place under broiler in oven. Watch carefully and remove when sugar has that caramelized melted look to it. Let cool and serve. For variations, try adding espresso grounds or cocoa to the tops before the brown sugar.

Notes:

  • It can be easier to add water to the baking dish when its already on the oven rack. Removing though still takes a steady hand.
  • Misting the sugar with water prevents the tops of the little lumps of sugar from burning.
  • Heating the cream significantly reduces the cooking time. If it is too hot when you add it to the egg mixture you will get sweet scrambled eggs.
  • Heating the water first significantly reduces the cooking time. Don’t use boiling or really hot water since you risk cracking a dish or turning the outside of the custard to scrambled egg.
  • I have found that the cream to sugar to egg ratio in various recipes varies sometimes significantly, mostly the amount of sugar. The above ratios I have used and seem to work well but you could probably reduce the sugar some if wanted.
Salted caramel with bacon version:

I used the following recipe to up the game.  My modifications were to use my egg yolk to sugar ratio from above; I used bacon salt in the mix; and I added some tiny bits of cooked cottage bacon to the mix.


The above blog recipe has all the good tips and tricks, its very well done.

Picture below is a double recipe in oven just before taking them out.

2011-11-05 20.09.23

Hearty Chili with Beer and Coffee

Hearty Baked Chili
This recipe was adapted from allrecipes.com and is one of my favorite chili recipe to date. And since it only calls for ½ bottle beer, you get to drink the rest of course while cooking.
INGREDIENTS:
  • oil
  • 1-1/2 onions, chopped
  • 2 cloves garlic, minced
  • 1 lb+ steak cut into ½” cubes (I like using a beefy tasting steak such as flat iron or chuck eye, or you can use sirloin)
  • 1 can diced tomatoes. (I use “fire roasted salsa style”)
  • ½ bottle dark beer (a chocolate porter is the very best for this chili)
  • 1/2 cup strong brewed coffee
  • 1 (6 ounce) can tomato paste
  • beef broth (see directions for quantity)
  • 3 TB brown sugar
  • 3 TB chili powder
  • 1 TB cumin
  • 1 TB dried oregano
  • Cayenne pepper or red pepper flakes to taste (start with ¼ tsp)
  • 1 tsp ground coriander
  • Salt and pepper
  • 2 (15 ounce) cans kidney beans (or sub 1 can for pinto)
  • 1 (8oz) can chopped green chilies (I use fire roasted)
  • 2 fresh hot chili peppers, seeded and chopped
Preheat oven to 400 degrees. Put some oil in big dutch oven and heat on stovetop to medium/medium-low. Add chopped onion and chopped peppers. Sauté briefly then add garlic and chopped meat. Mix well and season with salt and pepper. Put in oven for 1 hour uncovered. (Note that you aren’t browning the meat on top of the stove but in the oven.)
After 1 hour, remove from oven to a burner on medium heat. Reduce oven temp to 300. Add the rest of the ingredients except for beef broth. The beans can be added either with their liquid or drained and rinsed. Stir chili well and let it come back up to heat slowly. Add beef broth until amount of liquid is appropriate and consistency is how you want it. Cover pot and return to oven for at least 1 hour.
Remove from oven , test seasonings, and place on low burner uncovered for 20 minutes to rest, stirring occasionally. Serve with your favorite accoutrements like grated cheese, chopped green onion and sour cream.

Easy Chili Recipe (March 2020)

1lb+  chuck stew meat diced
1 onion chopped
2 medium carrots chopped
3 celery ribs chopped
2 cloves garlic minced
1 TBS chili powder
2 TSP Cumin powder
1 TSP dried Oregano
1 can fire roasted diced tomatoes
1 can green chilies
2 cans black beans with liquid
Salt
1 shot espresso
1 TBS brown sugar

In heavy dutch oven, salt and pepper and brown meat in batches, remove from pot
Saute vegetables until soft
Saute garlic lower heat for 45 secs
Add meat back in and rest of ingredients and spices
Add about 1/4 cup water
Salt to taste
Simmer or put in 300 degree oven covered for 2 hours
Check seasonings and add salt if required and simmer on stove top uncovered for 30 mins


Friday, February 25, 2011

Stuffed Chicken Breasts 2.0

Had a couple chicken breasts I needed to cook and had some leftover mascarpone and ricotta cheese from crostadas.  I wanted something “else” in the stuffing compared to last time, so lacking fine imported Italian prosciutto, I opted for bacon.  (Good bacon mind you, not the packaged stuff.)

Here we go:

  • (2) boneless skinless chicken breasts trimmed of “goobers” and sliced open on one side to form a pocket
  • Equal parts mascarpone and ricotta cheese (see notes below), about 1/4 cup each or less.
  • Parsley
  • Tarragon, rosemary, or chervil  (see notes below)
  • 1 slice thick good bacon or prosciutto cut into small dice or strips
  • salt and pepper
  • Peeled and sliced apple
  • sliced onion
  • Chicken broth
  • Olive oil

Brown bacon or prosciutto in a little olive oil.  Remove to a paper towel.  Sauté to almost brown the onion in the bacon pan and drippings.  Remove onions to cooking pot and layer apple slices on top.

Meanwhile… mix cheese and spices and bacon together in a bowl with your hands and stuff into chicken breasts.  Salt and pepper both sides of chicken and quickly brown stuffed chicken breasts on both sides carefully in bacon/onion pan after adding some oil.  Remove and place chicken on onions and apples.  Add about 1/3 cup chicken broth, cover and cook in 400 degree oven for about 30 minutes.

Notes:

  1. I used a clay pot which works wonders in these scenarios, leaving the meat moist and tender, since the terra cotta is permeable, it steams instead of boils.  For clay pots you start it in a cold oven and cook at 425.  I cooked for 40 minutes but it was probably 5 minutes too long.
  2. I used a ratio of 1:3 ricotta to mascarpone since that was all the ricotta I had, but it was a bit rich, thus the 1:1 ratio above.  Feel free to experiment.
  3. I used 2 slices of bacon but it was a little bit too much, thus the one slice above.  Once again, feel free…
  4. I used dried parsley flakes and dried tarragon, probably about 1.5 TBs and 2 tsp each.  The tarragon came through a little strong so I would cut that back next time.  Fresh herbs would definitely be preferred.

This turned out rich, tender and flavorful, pretty much what I was hoping for surprisingly enough.

The carrots you see below I did in the same frying pan as everything else (I like minimizing the number of pans to wash).  I deglazed with some dry vermouth, added about 2 TBs butter, and about 1/3 cup broth and then simmered the carrots covered for about 15 minutes, uncovering the last 5 minutes to reduce the sauce.  (the bacon and the chicken both add salt and pepper to the pan so no additional seasoning was required.)


In the clay pot.  Onions and apples are below.

IMG_0782

Plated with carrots.

IMG_0784

Friday, February 18, 2011

Crostata, Crostini, Oh My.

This past week Jeannine enjoyed a Crostata from the ex-chef home-ec teacher at CPSC.  Jeannine thinks she called it a Crostini, but we are pretty sure it was really a savory Crostata.  What’s the diff?  Well it appears that a Crostini is basically something built on some sort of toasted bread, and a Crostata is a dough based mini open- faced pastry thingy, usually sweet, but sometimes savory.

We did some googling of recipes and combined some things into what you see below.  This recipe has great potential for variation on the filling side, so feel free to experiment.  We plan to.

Dough (makes 2 individual servings):

  • 1.5 cups bread flour (like King Arthur)
  • 3 Tbs butter (room temp)
  • 1/2 tsp salt
  • 1.5 tsp lemon juice
  • 1/2 cup mascarpone cheese

Pulse dough ingredients in a food processer until dough pulls together .  Make into 2 equal balls and roll out on floured surface.  Place on parchment covered baking sheets.  Put filling in middle, roll/fold up edges about 1/2+ inches and bake at 375 for about 30 minutes until crust is golden brown.  Let rest for about 15 minutes and devour.

Filling (Arne’s version) makes ONE of the two Crostata’s:

  • 1/4 cup ricotta
  • 1/2 cup grated parmesan, mozzarella, fotina, romano mix, or similar.
  • 1/4 cup chopped fresh spinach
  • 1 oz small diced prosciutto
  • 1 medium leek, white and light green parts thinly sliced
  • 1-2 mushrooms sliced

Mix first three ingredients above and put on rolled out crust.  Sauté last three ingredients until leeks are soft and place on top of prior ingredients before baking.  Variation would be to sauté/caramelize leeks, then add prosciutto.

IMG_9635

Monday, February 07, 2011

Stuffed Chicken Breasts

I had some extra ricotta cheese and two boneless skinless chicken breasts in the refrig.   So here we go.  (I apologize in advance for the imprecise measurements.)

  • (2) boneless skinless chicken breasts
  • 1/2 – 3/4 cup ricotta cheese
  • 1/2 cup or so grated parmesan (used for both stuffing and coating)
  • 2 thick pieces of cooked bacon chopped
  • thyme
  • parsley flakes (or fresh)
  • salt and pepper
  • flour
  • panko
  • egg

Trim breasts of tenderloin and any other “weirdness”.  Cut a pocket in each.

Mix ricotta, parmesan (reserve some for coating), bacon, and then thyme, parsley, salt and pepper to taste.   (The parsley adds color so just keep adding until the mixture looks good.)

Stuff chicken breasts.  Coat first with flour, then with beaten egg, and then with a panko/parmesan/pepper mix.

Bake at 350 on a pan with parchment paper for about 30 - 40 minutes until done.

Could have used a little more fat so I think I would add some butter to the stuffing next time.  Could substitute fresh rosemary for thyme. 

IMG_0776

Monday, January 17, 2011

Braised Beef Short Ribs

Updated 2021 and 2022 with refinements over the years.

I have been refining my version of BBS for quite some time.  The infatuation started a few years ago when Olives Café in Edmonds regularly had short ribs on their menu and that is all Jeannine would ever order (for good reason).  As is true of all cooking, starting with good ingredients is essential for for the end result.  Good meat is really important.  Slow cooked low quality meat in cheap wine will taste like slow cooked low quality meat in cheap wine,.

After doing my requisite research I settled on this recipe.  I have to say that the picture had a lot to do with it, showing the syrupy nature of the reduction sauce.  I have made a number of refinements over the years, and logistical clarifications from that original recipe for my personal preferences.

Be forewarned that the aroma that fills the house for hours as you brown, braise and reduce is quite tantalizing.  Serves 4-6, or half the recipe for 2 people plus awesome leftovers.

Ingredients:

  • 12 beef short ribs, bone-in, 3” meaty, about 3 – 4 lbs.
  • Salt and freshly ground pepper
  • 1/4 cup high temp oil like avocado or grapeseed
  • 1 yellow onion, peeled and chopped
  • 2-3 stalks celery, chopped
  • 2-3 carrots, chopped
  • 1 bay leaf
  • 2 tsp anchovy paste
  • 1 750-ml bottle good full bodied red wine.
  • 6 +/- cups beef stock and/or veal stock if you can find it - preferably low salt (see notes on quantity)
  • Gelatin packet
  • 1/8 cup dried porcini mushrooms (optional)
  • 1-2 packets of Savory Choice Beef Broth concentrate (optional)
  • A couple cloves chopped garlic (optional)
  • 1 slice of smoked bacon chopped (optional)

Directions:

Season ribs with salt and pepper. Heat oil in a large, heavy bottomed ovenproof pot over medium high heat (read Le Creuset). Add ribs and brown on all sides. Work in batches so that the ribs don't get crowded  and start to stew.  Regulate heat so fond doesn’t burn.  Take it slow so much of the fat renders. Transfer ribs to a plate or bowl. Pour off the excess fat to only what is necessary for sautéing the vegetables.

At this point start the oven preheating to 285.  Lower heat on pan and add the onions, celery, and carrots to the pan and sauté slowly, stirring often, until soft and lightly browned, about 15-20 minutes.  If your are using the optional bacon, add it with the veggies or to the pot right before the veggies go in.  A little bacon goes a long way and can overpower everything, err on the side of less is more.  If you are using the optional garlic, add it at the very end and only sauté it for about 30-45 seconds before adding the wine.

Turn heat back up and add the wine to the vegetables.  If the moisture from sautéing the veggies didn’t deglaze the pan, then deglaze and scrape off any browned bits from the bottom of the pot. Reduce the wine to about 1/4 its original volume until thick and almost syrupy, not smelling like alcohol anymore, about 15 - 20 minutes.

Add the stock, anchovy paste, bay leaf, dried porcinis, and broth concentrate if using, mix well, then add back the short ribs in a single layer and bring to a simmer. Cover with the lid, and place in the oven. Braise, cooking in the 285 degree oven, until the meat is fall apart tender, 3+ hours. 

Pull the pot from the oven and allow it to cool a bit, then remove the ribs to a plate, and strain the liquid into a separate container, discarding the vegetables, return the ribs to the pot, and add back the strained liquid.  By this time the meat has probably separated from the bones.  Don’t be tempted to discard the bones, they contain collagen that will help thicken and flavor the sauce in the next phase.  I put the bones on the bottom of the pot with the meat on top to prevent any possible scorching.

Medium simmer on the cooktop uncovered until the liquid has reduced to about 1/4 of its original volume, while spooning the sauce over the ribs basting every ~5 minutes, until the sauce is thick and ribs are glazed. Yes this takes constant attention for about 1 hour.

(If the liquid doesn’t thicken, even after reducing, you can add unflavored gelatin as required to thicken.)

Serve with mashed potatoes or pasta or rice. The meat and sauce can be held covered in a 200 degree oven for an hour or more until ready to serve.

In the original pictures below, I made a mash of boiled red potatoes, roasted carrots, parsnips and garlic. 

Footnotes and Tips:

  • To eliminate having to scrub the inside of the lid clean later, put foil on the bottom of the lid before putting the lid on.
  • The optional dried porcinis add a nice umami to the broth, complimenting the anchovy paste
  • Technically, for a braise, the braising liquid should not completely cover the meat.  If so it is a stew. So adjust the liquid quantity appropriately.  It will cook down, even covered though, so don’t skimp.
  • Braising time can be 3-4 hours.  3 hours usually is sufficient. Figure an hour for browning the meat, chopping the veggies, sautéing, etc. before putting it in the oven.  And an hour for reducing and glazing.  So allow 5 hours.
  • You can also do this in two days, by taking it to the end of the braise and strain and then wrapping the meat tightly and the broth separate in a container and refrigerating over night.  This does two things:  The fat will separate and you can easily take it off solidified; and now you only have 1 hour total cooking time before you eat.
  • I used to add some tomato paste to the broth, but it seemed to make the final sauce cloudy, and added a little too much acidity for what I was going for.
  • Make sure to NOT use California Bay Leaves.  They have a much stronger and in my opinion bitter taste.  There is also some debate on whether bay leaves do anything, which I haven’t signed up for.  But feel free to leave them out.
  • Since the veggies are being strained out, I roughly chop them, and I never peel the carrots.
  • If you have ever gone to a restaurant and had sub-par BBS, tough, dry, not flavorful, etc., most likely they were held too long and dried out and/or the beef was not optimal and didn’t have enough fat.
  • Go easy on the salt.  With all the reduction of the sauce, it intensifies the salt ratio.


Some of the seasoned ribs waiting to be browned:

IMG_0764

Ribs starting to brown:

IMG_0763

Browned ribs set aside:

IMG_0765

Sautéing vegetables:

IMG_0766

Combined ingredients after braising:

IMG_0767

Ribs and sauce reducing after straining
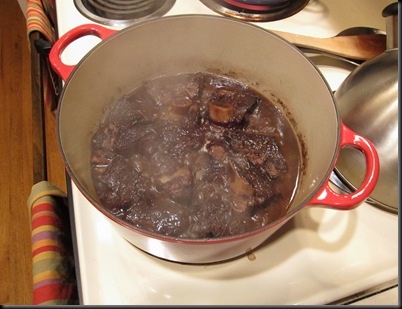
IMG_0769

Plated goodness:

IMG_0772

Saturday, December 18, 2010

Brussels Sprout Gratin

Nothing like oven roasting Brussels sprouts to fill the house with a rich food aroma.  I needed to come up with a recipe that would feed 25 as a side dish, and survive a 1 hour trip down the freeway.  I decided to make a gratin out of roasted Brussels sprouts and cover them with a Béchamel sauce, since sauce will cover a multitude of sins.

I have adjusted quantities by 1/4th, so the following should be plenty to serve 6 –8 as a side dish.

Ingredients:

  • 2 lbs Brussels sprouts, washed, trimmed, outer leaves removed and cut in half.
  • 1 medium sized onion roughly cut into 3/4” pieces
  • 4 pieces of thick cut bacon, cut into 1/2” strips
  • 1 TBs butter
  • 1 TBs flour
  • 1 cup of milk
  • Heavy cream
  • Salt and pepper
  • Dried Thyme
  • Cayenne pepper
  • Truffle oil (optional)
  • Grated parmesan
  • Panko bread crumbs                                       
  • Olive oil
  • Balsamic vinegar

Spread out halved sprouts on a foil covered baking sheet with the cut sides up.   Whisk together a 1/4 cup olive oil and 1 TBs balsamic vinegar and drizzle over sprouts.  Salt and pepper and sprinkle by hand with a little thyme (go easy on the thyme).  Add cut onions to the pan.  Drizzle with some more oil and vinegar.

Roast in a preheated 400 degree oven on the center rack for about 40 minutes turning every 10- -15 minutes until caramelized but not burned.

Meanwhile, in a heavy bottom dutch oven, fry bacon strips in a little oil until slightly crispy.  Remove to a plate with paper towels.  Wipe out excess oil from dutch oven.

Start the béchamel sauce before the sprouts go in the oven since it takes about an hour to complete.  Using two heavy bottom sauce pans, make a roux from the butter and flour and cook gently for about 10 minutes.  Make sure it doesn’t brown.  While the roux is cooking, heat the milk in the other sauce pan until steaming.  Pour the milk into the hot roux and whisk briskly until smooth.  Simmer the sauce on low , skim and stir frequently to keep it from scalding.  Stir in a couple ounces of cream at the very end to finish and simmer for another 5 minutes or so.  Adding a couple drops of truffle oil at a time and a pinch of cayenne, season to taste.

Remove sprout and onion mixture from the oven. Spread bacon pieces over the pan and sprinkle liberally with grated parmesan cheese.  Spoon gently into the dutch oven, pour the sauce over.  Sprinkle the top with a combination of Panko and parmesan.  Bake uncovered in a 350 degree oven until bubbling and topping is slightly browned.

Roux ready for the hot milk

IMG_0746

8 lbs of sprouts and onions starting to roast

IMG_0747

Finished sprouts, onions, bacon, parmesan (melted now) before adding sauce and topping

IMG_0748

Tuesday, December 14, 2010

Shepherd’s Pie

I’ll start off with a disclaimer.  My goal was to end up with a dish that tasted like beef pot pie (of the genre of my chicken pot pie), but was topped with mashed potatoes instead of pastry.  It didn’t turn out that way, but it was critically acclaimed by the eaters and I continue to make it again and again.

Note that this is pot and pan intensive. I usually try to limit dirty dishes to as minimalist as possible, but there really isn’t a decent way to cut corners on this dish. All I can say is, it’s worth it. (*see note below for shortcut version)

Serves 6+

Takes close to 2 hours from clean counter start to getting it in the oven if cooking at a “measured pace”.  So allow ~3 hours after baking and resting until eating. (*see note below for shortcut version)

[Updated 12/2023 and 3/2024 and 11/2025]

Ingredients:

  • 1+ lbs ground lamb (my preference) <OR> about 1.5 lbs of lamb or beef stew meat trimmed well and 3/4” cubed
  • 1 qt beef broth
  • 2 celery stalks chopped
  • 1 medium onion roughly chopped
  • 2 carrots cut into 1/2” pieces
  • 3/4 cup of green beans cut into 1” pieces (frozen peas could be substituted)
  • 1/2 medium parsnip cut into 1/2” pieces
  • 1/3 rutabega cut up into 1/2” pieces
  • 3 large russet potatoes
  • ~ 6 cremini mushrooms chopped
  • 5-6 cloves of garlic - 3 chopped for vegetable mix and 2 for mashed potatoes
  • salt and pepper
  • thyme
  • curry
  • cayenne pepper
  • butter
  • milk
  • flour ** See below for GF method
  • corn starch
  • olive or avacado oil
  • Panko (regular or GF)
  • grated parmesan

In a heavy bottom dutch oven like a le creuset, brown cubed meat salt and peppered in batches in light oil .  Keep heat high enough not to stew but not high enough to burn fond.  <OR> if using ground meat, don’t brown, just cook and fully render fat. Remove meat to a plate or bowl with paper towels to absorb grease.

Remove excess grease from pot, and sauté onions and celery.  Add garlic at end for about 30 seconds.

Add back meat and any juices, add other vegetables (except for potatoes).  Add enough broth to just cover.  Add seasonings to taste *.  Bring to a boil, reduce heat to a simmer and simmer uncovered for about 1 hour or until vegetables are soft.  (* I don’t usually measure seasonings since they are so variable to the underlying food and to individual taste.  I’ll add what feels like maybe 75% of what will be needed, then taste several times as it cooks, adding more if necessary.)

Meanwhile, peel potatoes and cut for boiling.  Boil with a couple cloves of garlic, and mash* and reserve in covered pot to stay warm.  (A normal mash, with butter and salt and pepper and milk to taste, etc.)

Prepare a roux of flour and butter**, about 3 TBs each when meat and vegetables are done simmering.  Strain broth into a sauce pan and bring to a simmer.  Reserve beef and vegetable mixture in baking dish or Dutch oven and keep warm in oven.  Separately whisk together 1TBs cornstarch and 1/4 cup of milk.

Pour hot broth slowly into roux and whisk into a gravy.  Be judicious as to how much of the broth you use, you may not need all of it.  Simmer to thicken about 10 minutes while stirring.  Add cornstarch mixture slowly while whisking until consistency is pretty thick. (Note I use both thickening techniques to get it as thick as needed so the end result is not soupy.)

Preheat oven to 325.  Pour gravy over beef and vegetable mix in a baking pan.  Add mashed potatoes to top in a thick layer.  Sprinkle some Panko and then some grated Parmesan over the top and some fresh ground pepper.  Bake in oven until bubbling and Panko is lightly browned - about 30 minutes (turn on broiler last couple minutes to brown if needed)

Remove from oven and let rest for 15 minutes then serve.

* Shortcut, GF, and fewer pan version:

While I like the end result of the original method above, you can cut off an hour, and multiple pans by doing it a little differently.  Use a very large cast iron skillet to brown the meat, sauté aromatics, and simmer vegetables and meat in broth. Instead of making a roux and using cornstarch, add potato starch slowly to simmering mixture (after it has cooked) while stirring to mix until consistency is correct.  Put mashed potatoes, panko and parmeson directly on top of mixture in the skillet and bake in oven per above.


Shortcut version pictures:


Wednesday, November 24, 2010

Chicken with Red Wine and Rice

Kind of boring title, but that is where I started with this recipe.  I wanted to make something similar to chicken marsala but different.  I bought some chicken thighs at the store this week and needed to use them before Thanksgiving.  So I synthesized a couple recipes into what follows. Served it with steamed broccoli.  No pictures, since I didn’t anticipate blogging it, but I needed to remember what I did since it was so good.

Ingredients:

  • 6 boneless, skinless chicken thighs  (The local QFC was very low on chicken, all the refer case space being taken up by various forms of Turkey and ham for the holiday.  So I actually deboned and skinned some regular thighs.  Added 20 minutes to the deal.)
  • Basmati rice (about 1 cup dry would work well for 3-4 servings)
  • 1 whole regular onion thinly sliced
  • about 1/3 bottle decent red wine  (Gascon Malbec was wine of choice tonight)
  • 1 Qt chicken broth
  • Thyme (about 1/2 + tsp)
  • Salt and pepper
  • Minced garlic (about 2 cloves worth)
  • Olive oil

Brown chicken in a heavy bottom dutch oven over medium to medium high heat in olive oil in batches.  Remove to a plate.

Sauté onions on medium to medium low heat in same pot.  When soft and slightly browned (about 10 minutes), add garlic and sauté for another one to two minutes.  Add chicken on top of onions and garlic and any juices from the plate.  Add red wine and bring to low simmer, add enough chicken stock to just barely cover the chicken.  Cover and simmer for about 30 – 40 minutes.

Meanwhile, prep rice and any side dishes so they will finish about 5-10 minutes after chicken is done.  I used basmati rice cooked with chicken broth.

When chicken is done, and about 10 minutes before side dishes are done, remove chicken and most of the onions to a platter with a slotted spoon, cover with foil and keep warm in a 175 degree preheated oven.

With lid removed, simmer liquid in pot to reduce to about 1/2 original.

Serve on warm plates by putting chicken and onions on bed of rice with reduced liquid on top.

Turned out so good that Jeannine, Nicole and I devoured all six chicken thighs with no leftovers.

Sunday, November 21, 2010

Pork Tenderloin “make it up as you go” Clay Pot

Have done pork tenderloin in a clay pot several times, but this time was the most successful by far in the taste department.  Just kind of made it up as I went.  Clay Pot cooking for the uninitiated uses a 2 part clay pot that you soak in water, put the food in, place in a cold even and then cook so that the food steams and cooks.   While the clay pot produces wonderfully tender food, this recipe could be done in a Le Creuset or other dutch oven.  Serves 2-4 depending upon size.  Prep time 30 minutes, cook time 60 minutes.  If using a clay pot, soak per manufacturers instructions first.

Ingredients:
  • One large or two small pork tenderloins cut into halves and trimmed of silverskin and other “goobers”.
  • 4-5 red potatoes sliced thinly
  • 1 large or 2 medium onions sliced thinly
  • 2 tart (like granny smith) apples peeled and sliced
  • 1/2 – 3/4 cup chicken broth
  • 1 tsp apple cider vinegar
  • olive oil
  • salt and pepper
  • thyme
  • parsley flakes or fresh italian parsley
Sauté onion in olive oil until translucent and soft in a heavy bottom pot.  If not using a clay pot, use the dutch oven you are going to finish in.  Remove onion to a plate or dish.
Turn up heat and brown pieces of salt and peppered pork tenderloin.  Only do one or two pieces at a time to prevent them from stewing.  Remove to a plate or dish.  (these should be browned but not cooked, use high enough heat to brown well, but not burn.)

In clay pot (or dutch oven) assemble as follows:
  • about half the onions on the bottom of the pot
  • about 1/3 the apple slices
  • pork with a sprinkling of thyme and parsley
  • the rest of the onions
  • then layer apples, potatoes, salt and pepper, thyme, parsley and repeat
  • carefully pour in chicken broth on the side to keep from washing away seasoning and add the apple cider vinegar
Cook at 425 for 50 – 60 minutes until done.  (Note:  clay pots go in a cold oven.)

Clay pot out of the oven after cooking with lid removed.  Pork, onions and apples are buried underneath the potatoes.
IMG_0722

Plated food.  Steamed broccoli was accompaniment:
IMG_0723

Wednesday, November 17, 2010

Indiana Jones and the Grains of Paradise

Well it could have been a movie…
I wanted to make a lentil soup, so I checked out one of my favorite sources for reliable recipes, Alton Brown of the Food Network.  He had what looked like a great basic recipe that had good reviews here.  It had an interesting ingredient however: grains of paradise.  After doing quite a bit of online research to see where I could find this mysterious and exotic sounding spice locally (vs. going to Pike Place Market Spice Merchants), I found it at the Sea Salt Superstore in Lynnwood which has lots of specialty salts, peppers and spices.
Long story short, the soup was wonderful and easy to make.  The GOP’s, frankly were a non-event.  Since the minimum quantity I ordered far exceeded what the recipe called for, I kept adding and adding to see if I could actually taste the spice.  Pretty much like mild pepper if you ask me though freshly ground it has a very interesting and intriguing aroma.  Good thing is, you don’t need it for this recipe. Variations could include curry for sure.
  • 2 TBs olive oil
  • 1 cup finely chopped onion
  • 1/2 cup finely chopped carrot
  • 1/2 cup finely chopped celery
  • 2 tsp salt
  • 1 lb lentils picked and rinsed ( I used multi-colored to add interest)
  • 1 cup peeled and chopped tomatoes (I used canned)
  • 2 quarts chicken or vegetable broth
  • 1/2 tsp freshly ground coriander (I used the pre-ground spice)
  • 1/2 tsp freshly ground toasted cumin (I used the pre-ground spice and didn’t toast it)
  • 1/2 tsp freshly ground grains of paradise (see notes above)
Sweat onions, carrots, celery in the olive oil with the salt in heavy bottom stock pot until translucent and soft.   Add lentils, tomatoes, broth, spices and stir to combine.  Bring to a boil, reduce heat to simmer and cover until lentils are tender, around 30-40 minutes.  Using a stick blender, puree to your preferred consistency.  Serve immediately.
[Made this tonight sans the tomatoes (since I had none), using 1/2 the broth and lentil ratio to full quantities of veggies.  Added some red pepper to the finely chopped veggies at the beginning and used the following spice ratio:  1/4 tsp each of coriander, cumin, curry.  Was quite good ]

Updated Go To Lentil Soup March 2020

  • Avocado oil 
  • 1lb ground mild italian sausage - either bulk or remove casings.  Can use chicken sausage too
  • 1/2 cup finely chopped onion
  • 1/2 cup finely chopped carrot
  • 1/2 cup finely chopped celery
  • salt to taste
  • 1 cup+ lentils picked and rinsed - current fav is small green lentils from PCC bulk food section
  • 1 can petite diced tomatoes
  • 2 quarts chicken or vegetable broth
  • Cumin to taste (~ 2 TSP)
  • Curry powder to taste (~2 TSP)
  • Harrissa paste to taste (1/2 TSP depending on heat level)
Brown sausage, remove to bowl
Saute veggies
Add everything back to pot
Simmer 30-45 minutes
Stick blend to desired consistency

Can add Kale too


Monday, November 15, 2010

Roasted Butternut Squash Soup

Had this rough idea in the brain for a long time and finally got around to trying it out.  Basically made it up as I went, aided by what I had on hand.  The end result was quite tasty and I would definitely make again.  Can be adapted for vegetarian by switching the broth.  When all was said and done, it was really pretty easy.  45 – 60 minutes to roast the squash and about 15 more minutes to finish it off.  Serves 4 first course.

  • 1 medium 2-3 lb butternut squash
  • 1/2 large onion finely chopped
  • 1-2 stalks celery finely chopped
  • 1 Tbs minced fresh ginger root
  • olive oil
  • 1 Qt  Chicken (or Vegetable broth)
  • Curry
  • Chinese Five spice
  • Salt and Pepper
  • 3 TBs cream or half and half to finish

Cut squash in half, remove seeds, coat lightly with olive oil and put on a foil covered pan.  Roast loosely covered with foil at 425 for 30 minutes.  Remove cover and roast another 15 – 30 minutes until fork tender.

Meanwhile…  finely chop vegetables and sauté in heavy bottom soup pot on medium low heat in olive oil until translucent and tender, about 10 to 15 minutes.  Add about 3/4 of the broth and bring to a simmer for another 15 minutes or so while squash is cooking.

Remove squash from oven when done, let cool a little for easier handling, and scoop out flesh from skin.  Add roasted squash flesh to simmering broth.

With stick blender, puree soup until smooth.  Add some of the remaining broth if necessary to get desired consistency.  Season with Curry (1-2 tsp to taste), Chinese Five spice (1/4 tsp + to taste), salt and pepper.  Let sit for 5 – 10 minutes on low heat until flavors meld, then finish with the cream and serve immediately.

IMG_0719

IMG_0720

Thursday, November 11, 2010

Fall Wild Mushroom Soup

One of my favorite soups, but one that has to wait until mushrooms are plentiful and cheap.  This recipe is actually a combination of two of James Petersons recipes from his “Splendid Soups” book with very little modification.

Made this tonight since the Thriftway had wild chanterelles on sale for 4.99/lb.  These were obviously wild harvested since they had a lot of pine needles in them.

This soup comes together quite quickly at the end, so I would recommend prepping everything beforehand in prep bowls before starting, otherwise something is going to get overdone while waiting for prep.

Serves 4

Soup Base (Mushroom Veloute)

  • 1 medium sized onion finely chopped (about 1 cup)
  • 4 TBs unsalted butter
  • 1 TBs olive oil
  • 3 TBs all-purpose flour
  • 1 QT chicken stock
  • 1/2 Cup Madeira or DRY sherry (don’t be tempted to sub cream sherry)
  • 1 lb +/- cremini mushrooms cleaned and roughly chopped
  • 1/4 lb chanterelles cleaned and roughly chopped **
  • 1/4 lb portabellos cleaned and roughly chopped **
  • 1 TBs dried porcini mushrooms **
  • 1/2 cup cream or half and half
  • salt and pepper

Garnish

  • Sliced portabello and sectioned chanterelle mushrooms.  Enough for 2-3 pieces each for each serving (4)
  • olive oil
  • salt and pepper

** Chanterelles and portabellos are both used for the garnish.  Base total amount of mushrooms on combined requirement.  Use the stems and sides and unattractive parts for the soup base, reserve the good parts for garnish.  Other wild mushrooms can be added/subbed for more interest.  Fresh porcinis can be used instead of dried but they are usually very expensive.

Start the the dried porcinis soaking in the Madeira or dry sherry.  If you have neither you can use dry vermouth in a pinch like I did tonight.  These need about 20 minutes so time accordingly.

Prep the rest of the ingredients, making sure you have some good looking slices of the exotic mushrooms for garnish.  Keep these dry.

Prepare a veloute by sautéing the chopped onion in the butter and olive oil.  Sauté on medium heat until translucent stirring almost constantly to keep from any browning, about 10 minutes.  Add flour and sauté another 5 minutes to cook out the starchy flavor.

Add the broth and prorcinis and Madiera, bring to low simmer for about 5 minutes.  Add the roughly chopped mushrooms reserving those for the garnish.  Using an immersion blender, blend up all the mushrooms until smooth.  Reduce heat and add cream or half and half.  Season with salt and pepper to taste.  Keep hot but not simmering.  (Note that you aren’t “cooking” the blended mushrooms, the soup base is done at this point.)

In a medium hot pan with olive oil, brown the garnish sliced mushrooms, turning once.  Make sure the pan is hot before adding mushrooms and not to crowd the pan so the mushrooms brown and not stew.  Do in batches if necessary.  Season with salt and pepper.  Reserve to a hot plate.

Serve soup in bowls immediately, garnished with the browned mushrooms.

(The original recipe called for adding a persillade to the browning mushrooms for the garnish.  A persillade is a mixture of minced shallot, garlic and parsley.  You will see this in the pictures below.  I didn’t feel this added anything to the soup, was very hard to keep from burning and added a level of complexity at the end that was a pain.)

The Thriftway was having an “open house” sale today (guess they didn’t want to call it a Veterans Day sale) and part of the deal was 4 bottles of wine for 15% off.  Got some 2008 Corvidae Rook (made by Owen Roe) which is a wonderful sub $15 CMS red blend.

****************************

Mushrooms prepped and ready

IMG_0708

Sautéed onions ready for the flour

IMG_0705

After the flour was incorporated and sautéed for another 5 minutes

IMG_0709

The dried porcinis soaking in the booze

IMG_0707

Veloute with mushrooms ready for stick blending

IMG_0712

After the blending

IMG_0715

Garnish mushrooms with persillade

IMG_0717

Ready to eat!

IMG_0718